Monday, October 31, 2011

Let's face it...Halloween is ALL ABOUT THE CANDY !

Since Halloween is "ALL About THE Candy" for the kiddos, and lets face it most adults too, here is a fun CANDY BANNER to get you in the mood.
This banner was made using the Tim Holtz Distress Halloween Kraft Resist Paper
and Distress Inks. Each tag is done using a different distress ink technique.

The Kraft Resist paper is so cool when you add
the distress ink over the top!

I used my Cricut to cut out the letters for each tag out of
the resist paper.  I added distress ink and some distress stickles to make
then spooky sparklie !
As usual, Tim thought to have large, medium and tiny
prints in the paper pad.  I used the tiny paper as
an embellishment and after inking with distress inks,
I outlined with stickles.

It was fun to find some unique embellishments such
as these orange paper flowers that I added stickles too,
the fun glittery epoxy spiders and bats and most of all
the Jolee's Skeleton which I touched with a little distress
ink to highlight his bones ...CREEPY !

If you noticed, I even distress inked the skeleton ribbon that
the banner will hang from. 

NOW WHO WANTS CANDY ??????????????????

Sunday, October 30, 2011

Halloween Treats...NOT Tricks

There are so many yummy treats that can be made for Halloween....Caramel Apples, Popcorn Balls, Pumpkin Bread, Candy Corn, etc.

How would you like a way to put all your families favorite Halloween treats into one cute mini recipe album?
Well, I made this adorable Halloween Recipe album a couple of years ago and wanted to share with you.

The cover is made from chipboard cut slightly larger than
the recipe cards inside. And is hole punched on the top and bound
with binder rings and a variety of ribbons tied on.
 The title is made with glittered chipboard Thicker alphas.
And the treat bags are patterned paper cut out and some stickles added. 
 I love to tie ribbon on to mini album covers for added texture.  

Cute Halloween recipe cards go on the inside.
I added a spot along with each recipe card
so that there was room to add a picture
of the Halloween treats.

I added a few more pages to the inside
by cutting cardstock in same size as recipe cards.
Again, more pp cut out to make an embellishment
and added stickles.

A few more pages to show you.


This would also be an awesome way to do a Christmas or Thanksgiving
Recipe Books for your family or gifts.  You can find lots of cute
holiday recipe cards right now at various stores.  I know I saw some at
Michaels and Target recently.  In fact I bought some Christmas ones myself.

Saturday, October 29, 2011

Happy Halloween !

With all the fun Halloween pictures we are sure to take tonight, I am glad I put together this layout to document all the spooky adventures.

I made this layout for a class I am teaching at Michael's Craft Store.
Lots of fun Halloween papers and plenty of room to add some great
Halloween photos to remember our Spooky evening.

Friday, October 28, 2011

More Halloween Cards

Here are a few Halloween cards I made to send to the kids in our family.  Of course, I am including a few Halloween treats along with these cards for the kiddos.

I don't usually make Halloween cards but I must say I have been having fun this year making them. And the selection of Halloween papers has been too hard to resist.
I just loved this Halloween paper together.  The
ghost is a 3d glittered embelllishment from K&Company.
I used a Halloween wood $1 stamp from Michaels
for the Happy Halloween sentiment.  It is such a cool font.

Who can resist a spider and his web on Halloween?
This paper looked like it was custom made
for the little 3D embellishment.
Again, I used a $1 stamp from Michaels
for the sentiment.

Thursday, October 27, 2011

Getting Ready for some Halloween Treats

I will be making some cupcakes to take over to my granddaughter for her Halloween party this weekend. Decided it would be fun to make some Halloween Cupcake pics to decorate them.

Since I didn't have the cupcakes ready yet, I bunched up some
spider web material and set them in it to show them off.  LOL
I started out by making small paper medallions for each one in a variety of
Halloween patterned paper.

Here is a close up view.  I added stickles around the edges
on some of the paper medallions.
Michaels craft store had a pack of the these glittered
embellishments that were perfect for some of the centers.
I punched a piece of cardstock, added some stickles to the
edge and then used a glue dot to put on the embellishment.

To make the paper medallions into a cupcake pick,
I used extra long tooth picks, a punched out circle out of
cardstock and my Tim Holtz Tiny Attacher to
staple the toothpick to the cardstock.
I then used hot glue to glue the cardstock piece to the back
of the paper medallion.

And waaaalah !  My very own custom made Cupcake Picks.
You could do something like this for any occassion.  It was so fun to
make these and didn't take much time. I made 24 (4) of each design.

Wednesday, October 26, 2011

Something Witchy in the Air !

I made this Witch Halloween Easel Card to send a friend for Halloween. 
Had fun using different cuts from cricut carts and some stickers I had in my stash.


Here is the Easel card opened up. I used black glittered half dome pieces to
use as the stop mechanism for the easel. 

Monday, October 24, 2011

And the Winner is....

Thanks for stopping by and leaving such nice comments on my Fall/Halloween Challenge Blog Hop post. Hopefully you were as inspired as I was by all the fantastic projects the other design team members created for this special hop. 

Drum roll please...the winner of my Star Bucks $5 gift card Blog Candy is :

Carolyn/MamaC said...
What a fun, unique banner! Love all the "fluff"!! Great job!
October 23, 2011 5:46 AM

Congrats Carolyn.  Please send me your mailing address to scraphappydeb2010@gmail.com and I will get your Star Bucks gift card in the mail this week.  Enjoy !

Fright Night Paper Bag Album

One of my all time favorite things to make are mini albums.  I made this Fright Night Paper Bag Mini Album to capture this years Halloween pictures.  I added a few twist to the normal paper bag album by making three different fold outs for more pictures to jazz it up a little and I have provided some directions for how I did that.  If you have never made a paper bag album there are tons of videos on You Tube to show you how.

Cover of album. I used the DCWV Midnight Magic Paper Pad.
Loads of fun glitterly and bold printed Halloween paper!

I wanted to have a closure for my mini album so I used
some twine and a couple of buttons. Using a mini hole punch I 
punched 2 holes in the cover and threaded the twine through that and the large button
and tied it on to create the front closure part.  The small button in the picture
is actually tied to a long piece of twine and tied to the back cover.  (see later picture) 

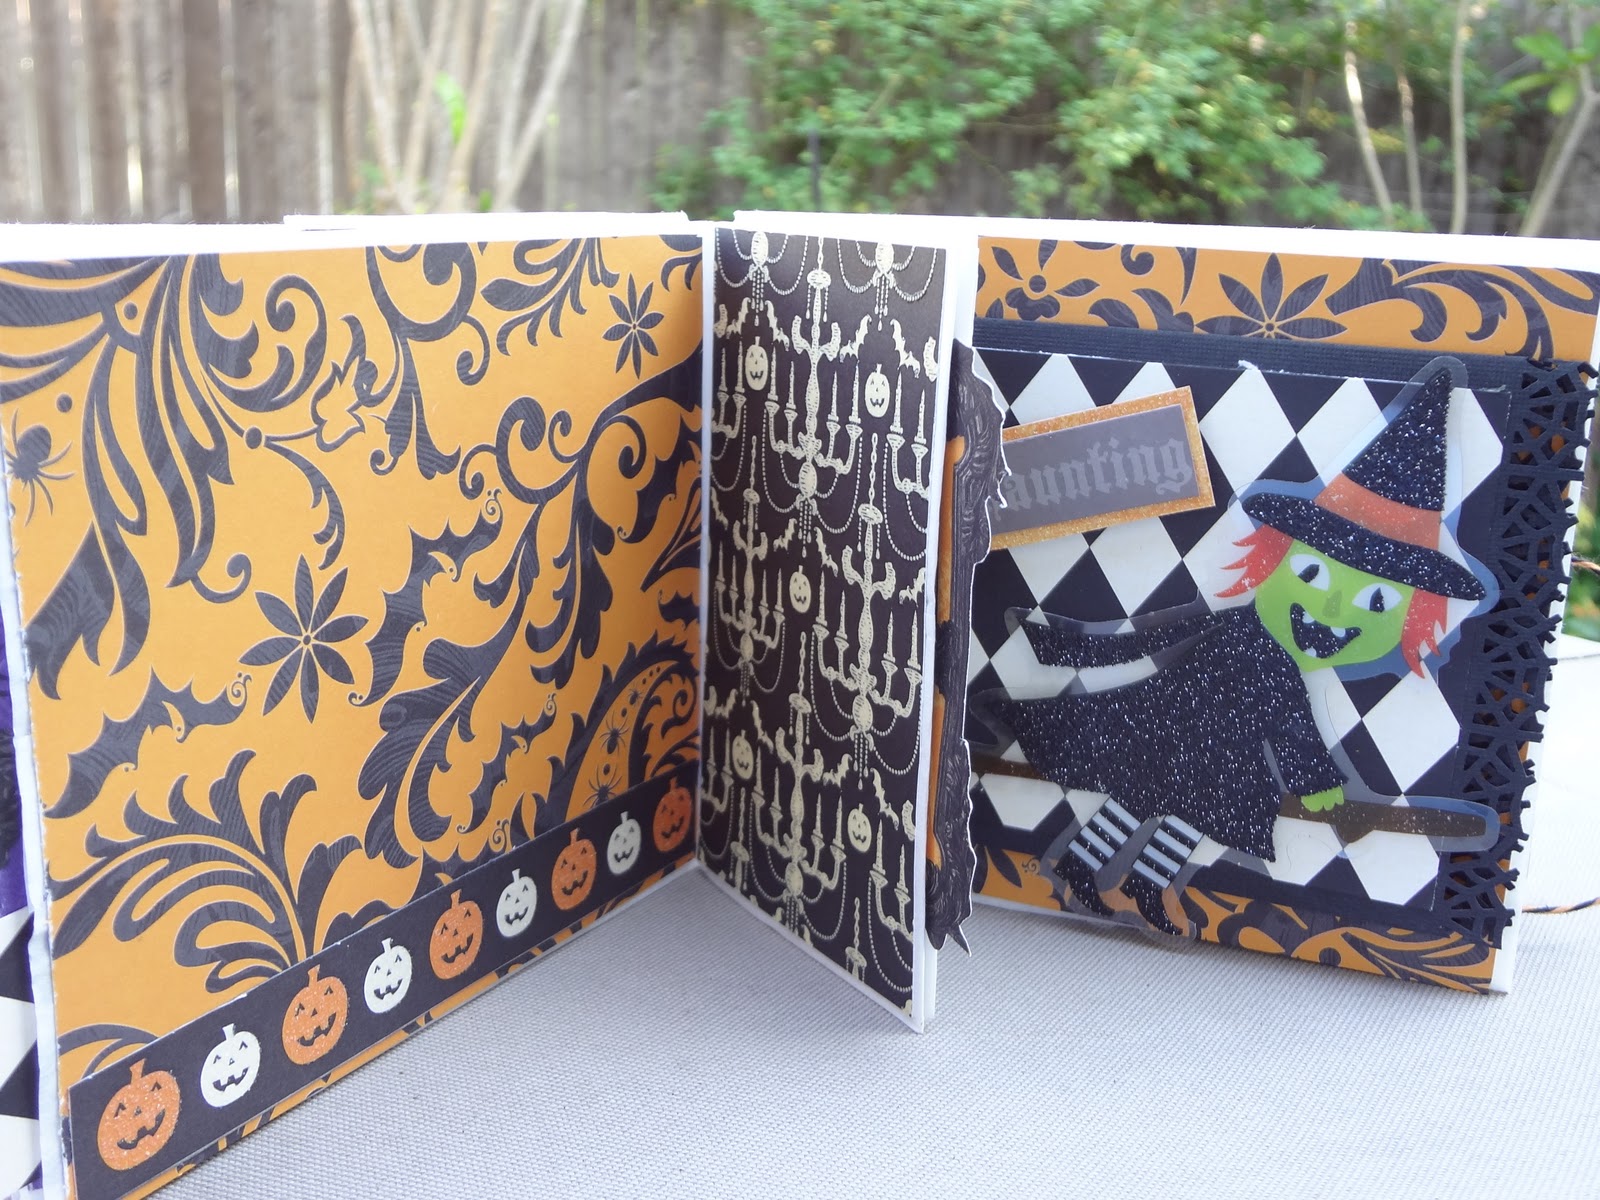
Inside page 1&2 and the mini pocket that is created with the "bottom" of the paper bags.
Inside page 3&4 and mini pocket
Special Fold Out #1 is adhered to page 4
To create the fold, I used a piece of 12X12 cardstock, 
cut in half to create a 6x12 piece  (save the other half for Fold #2)
I used MS Spider Web border punch and punched along both 12 inch sides.
Then I scored at 4 & 8 inches to create the folds. 
 Added a 1 in strip of pp to bottom of inside fold. 
I know have room for 3 more 4X6 photos and/or journaling.
Adhere the middle fold to the paper bag album page already covered in pp.
Fold up the bottom flap and let the top flap fold down over that.
Then I decorate the top piece of the fold with pp and some
embellishments for a finished look.
Special Fold Out # 2
This fold is created using the other half of the 6X12 section I cut for Fold Out #1
I placed it on an inside pocket tag I created by cutting a 12X12 piece of pp to 4.5 inches
by 12 inches and folding in half to create a front and back. I added a strip of pp
to the side of it to create a tab for my tag.  This is how I made all the Large Tags
I used in the pockets of the paper bag mini album.
I scored the 6X12 piece of cardstock at 4 inches,
then flipped it over and scored at 8 inches.
Thus creating an accordian fold.
Using the MS Spider Web Corner Punch,
I punched the corners of each 4X6 section of the fold out.
Only the top 4X6 section is adhered to the tag.
The rest folds up and ready to pull down to expose photo spaces.

Shows the accordian fold of the 6X12 piece after scoring & folding.

the bottom 4X6 flap up towards the middle flap and
here I added a journaling block.

I then decorated the cover with some pp and a 3d paper embellishment
from Me&MyBigIdeas. I added another of those twine tied
buttons for some added pizzaz.
Inside Pages 5&6 with small pocket.

Special Fold Out #3
is added to page 6 of the paper bag album
after pp has been added to the page

This fold takes (1) 12X12 sheet of cardstock, scored at 4&8 inches along top side,
then turned to score at 4&8 inches along left side.  This will create (9) 4X4 blocks scored
on the 12X12 page.  Cut out the 4 corner blocks.  You will now have a Plus Sign
looking piece with (3) 4X4 blocks horizontal and (3) 4X4 blocks vertical. 
Adhere middle 4x4 square to the center of your mini album page.

Fold the bottom 4X4 square up to the middle, then the left to the middle
Then Fold the right 4X4 square to the middle
And lastly fold the top 4X4 square down over the top of all the others.
Adhere pp to the top square and embellish.  Decorate each inside square as you like. 
 
Example of anothe Large Tag decorated for inside
paper bag album pocket (front side). I hung an
embellishment from twine so it dangled on the front
and back side of the tag.  I added a journaling
block to the front side.

Back side of the pocket above ready for more photos.
For the small pocket inside tags, I just cut double sided patterend paper and
added a 1" pp border for each of the small tags.
The back cover and closure

I hold punched 1 time on the back cover and tied
the long piece of string using about 3 good knots to hold it in place.
I added a little mini button to the loose end that will wrap around
to the front cover to secure the album.
I also added pp to the folded bag edge of the mini album
for a finished look. You can do this before or after you add your covers.

Hope you enjoyed my Fright Night Halloween Mini Album and feel inspired to create one of your own!

Saturday, October 22, 2011

Welcome to the Fall & Halloween Challenge Blog Hop


Hi everybody !  Welcome to our Fall and Halloween Blog Hop hosted by Pam of the The Bug Bytes.  You should have arrived at my blog from Kelly at Kams Crafty Space if you just jumped in you might want to go back to The Bug Bytes so you don't miss any fabulous projects.  All of on The Bug Bytes Design Team just love creating crafty projects this time of year. We wanted to share some of our special Fall and Halloween projects with you on this blog hop so be sure and stop by each DT member's blog to get inspired.  Pam is offering some blog candy (special prize) so see her rules on her post at the start of this blog hop.  I am also offering some blog candy...read on to find out how to enter.

I just LOVE to make banners to decorate my home during the holidays!  A couple of years ago, I made a large Halloween Banner that I have already hung up in our family room that you can see HERE.  This year I wanted to make a smaller Halloween banner to hang up in my Kitchen.  When I think of Halloween, spooky Ghost always seem to come to mind first so I went with the Ghost theme for my banner.


I started out by making the banner pieces out of Bazzill cardstock
cut into triangles. 

Next I used the Martha Stewart Spider Web Punch
to create a border to go across the top of each banner piece
in alternating background colors. And I added some fun
polka dot ribbon to hang the banner pieces from the garland.

I made the large Rosettes starting by cutting (2) 12" X 3" strips
of Halloween pp, scoring them each at 1/2" marks using my Martha Stewart Scoring Board
and adhering the two pieces together with redline tape, and  folding to create the rosette. 
I used a 2" circle punch  to cut two cardstock circles per banner piece.
I hot glued one circle to the front of the rosette and another on the back
 to create a more stable rosette. I then added a 1 1/2" circle punch piece in a different
color cardstock and added a Thickers Varsity Letter to complete the banner word. 
For a finishing touch I hot glued some K&Company Halloween 3d embellishments.

Hope you liked my Halloween Banner...I am hanging it up in the kitchen window along with some cute ghost ceramic candle holders to keep the Halloween Spirit flowing through my house!

If you want a chance at my Blog Candy Give Away, just leave a comment on this post before Noon on Monday October 24th.  The lucky winner will receive a $5 Starbucks gift card !!  Perfect to getting a Latte or Hot Chocolate to keep you warm during the fall weather.

Thanks for stopping by.  Okay, time for you to hop to the next blog for more inspiration!  Please hop on over to Carole's blog at On My Craft Room Wall

LinkWithin

Related Posts with Thumbnails