Showing posts with label Banners. Show all posts

Saturday, December 10, 2011

2011 Christmas Banner

I LOVE making banners to display in my home.  In the past few years I have made Birthday Banners, Easter Banners, Halloween Banners, Thanksgiving Banners....it was finally time to tackle the all important Christmas Banner ! 

I collect Santas...not just a few, at last count I had about 200 that I display in various rooms of my home and my Christmas tree is decorated with about 300 plus santa ornaments.  So to say I like Santas is an understatement!  So I naturally gravitated towards making a Christmas Banner featuring Santa.

Each banner piece was made from a shaped piece of heavy cardstock, covered with patterned paper with a crepe paper border and then decorated with lots of Christmas embellishment treastures. On three of the pieces I attached the glittered letters Ho...when hung up, it now says HO HO HO !

Without further ado....here is my Christmas Banner, piece by piece.

When I was little I asked Santa one year, " please define good?
Ha, Ha.  I Found this metal piece that had that on it and just had to put it on my banner.
Close Up  of this first piece.  I added chipboard shapes and
added stickles to give them sparkle!
On this banner piece the Merry Christmas is suspended above
the background to give it a lot of dimension !
My favorite banner piece is this one!
I found the perfect vintage Santa paper for the background. 
For the 25 I used silver german glass glitter to cover the chipboard,
it looks amazing up close.  I used some vintage tinsel around the edges
 of the crepe paper.  I added more to the HO piece here...a glittered Believe,
a Santa and a red sleigh bell !

Again on this piece, I suspended the Joy over the
banner piece.

This piece is a tribute to Christmas Carols. I used
Joy to the World music paper as background.
And added titles from some of my favorite christmas songs. 
Deck the Halls, Jingle Bells, O Christmas Tree,  etc.

Close up of this piece.  All the images are added on and popped up
for added dimension. And of course, more glitter !!

And here is the banner all strung up on a red and green tinsel garland.

Sorry the picture isn't so great but you get the idea of how it looks now all hung up !

Monday, November 21, 2011

Getting Ready for Thanksgiving

Well, we are down to the final 3 days before the big Thanksgiving Feast in the USA is upon us.  Time to start pulling out all the Thanksgiving decorations and getting them put up.  Luckily, last year I made quite a few things to help bring the Thanksgiving feeling to our family dinner. Here are some of those projects from 2010:

The mantle banner says Give Thanks. I made it with
various chipboard pieces covered in fall themed patterned paper.
I added a ruffled crepe paper trim around some of the pieces
and them decorated with all kinds of fall ribbons and
embellishments I had collected over the years. 
Loved how it turned out !


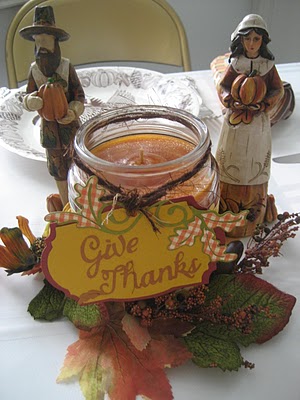
I made these special Thanksgiving candles
from glass jar candles I bought at Michaels
and then wrapped a strip of fall paper around the middle.
Then I used the Cricut Lacy Labels and Thanksgiving
cartridge to make these Thanksgiving themed
tags and hung from each with fibers. 
A few pilgrims and indians and some fall foliage scattered
around the table and we had lovely table decor.

For place settings we used gold chargers with our Turkey paper plates.
LOL...how is that for elegance for a crowd? 
My granddaughter and I made the napkin ring holders
our of cardstock and patterned paper rings, a scalloped shaped punchout,
and some felt pilgrims boys and girls in felt we bought at Hobby Lobby.
Tada ! 

So this year, all I need to do is unpack all these handmade gems and set the table !  Come back tomorrow and I will show you what I made for this year's Thanksgiving.

Monday, October 31, 2011

Let's face it...Halloween is ALL ABOUT THE CANDY !

Since Halloween is "ALL About THE Candy" for the kiddos, and lets face it most adults too, here is a fun CANDY BANNER to get you in the mood.
This banner was made using the Tim Holtz Distress Halloween Kraft Resist Paper
and Distress Inks. Each tag is done using a different distress ink technique.

The Kraft Resist paper is so cool when you add
the distress ink over the top!

I used my Cricut to cut out the letters for each tag out of
the resist paper.  I added distress ink and some distress stickles to make
then spooky sparklie !
As usual, Tim thought to have large, medium and tiny
prints in the paper pad.  I used the tiny paper as
an embellishment and after inking with distress inks,
I outlined with stickles.

It was fun to find some unique embellishments such
as these orange paper flowers that I added stickles too,
the fun glittery epoxy spiders and bats and most of all
the Jolee's Skeleton which I touched with a little distress
ink to highlight his bones ...CREEPY !

If you noticed, I even distress inked the skeleton ribbon that
the banner will hang from. 

NOW WHO WANTS CANDY ??????????????????

Saturday, October 22, 2011

Welcome to the Fall & Halloween Challenge Blog Hop


Hi everybody !  Welcome to our Fall and Halloween Blog Hop hosted by Pam of the The Bug Bytes.  You should have arrived at my blog from Kelly at Kams Crafty Space if you just jumped in you might want to go back to The Bug Bytes so you don't miss any fabulous projects.  All of on The Bug Bytes Design Team just love creating crafty projects this time of year. We wanted to share some of our special Fall and Halloween projects with you on this blog hop so be sure and stop by each DT member's blog to get inspired.  Pam is offering some blog candy (special prize) so see her rules on her post at the start of this blog hop.  I am also offering some blog candy...read on to find out how to enter.

I just LOVE to make banners to decorate my home during the holidays!  A couple of years ago, I made a large Halloween Banner that I have already hung up in our family room that you can see HERE.  This year I wanted to make a smaller Halloween banner to hang up in my Kitchen.  When I think of Halloween, spooky Ghost always seem to come to mind first so I went with the Ghost theme for my banner.


I started out by making the banner pieces out of Bazzill cardstock
cut into triangles. 

Next I used the Martha Stewart Spider Web Punch
to create a border to go across the top of each banner piece
in alternating background colors. And I added some fun
polka dot ribbon to hang the banner pieces from the garland.

I made the large Rosettes starting by cutting (2) 12" X 3" strips
of Halloween pp, scoring them each at 1/2" marks using my Martha Stewart Scoring Board
and adhering the two pieces together with redline tape, and  folding to create the rosette. 
I used a 2" circle punch  to cut two cardstock circles per banner piece.
I hot glued one circle to the front of the rosette and another on the back
 to create a more stable rosette. I then added a 1 1/2" circle punch piece in a different
color cardstock and added a Thickers Varsity Letter to complete the banner word. 
For a finishing touch I hot glued some K&Company Halloween 3d embellishments.

Hope you liked my Halloween Banner...I am hanging it up in the kitchen window along with some cute ghost ceramic candle holders to keep the Halloween Spirit flowing through my house!

If you want a chance at my Blog Candy Give Away, just leave a comment on this post before Noon on Monday October 24th.  The lucky winner will receive a $5 Starbucks gift card !!  Perfect to getting a Latte or Hot Chocolate to keep you warm during the fall weather.

Thanks for stopping by.  Okay, time for you to hop to the next blog for more inspiration!  Please hop on over to Carole's blog at On My Craft Room Wall. 

Monday, February 8, 2010

Kisses, Hugs, Love, Hearts....Oh My !

Like the rest of the scrappy world right now, I am loving creating banners to display in my home. And of course I couldn't resist creating one for Valentines Day.  INSPIRE the people in your life to stop and enjoy the day of LOVE on February 14th !      (Click on the pics to see close up)


Had fun with these acrylic butterflies from K& Co.
Loved folding them to make them POP OFF the Jenni Bowlin BINGO CARD
I seriously HEART chandeliers and isn't that felt cupid adorable ? I glimmer misted the doily hearts...
wish you could see how they shine better in the pics.
Yes, that really is a dangling, sparklie HEART hanging from the bottom of this banner piece! 
And yes, that really is an old Lil Davis Valentine Embellishment I have been saving in my stash for a special occassion and this was it !  {I really loved that company and was sorry to see them go out of business.} Hope you noticed I added a few pieces of the Valentine Treat bags to accent this embellishment.
I have also been saving my very last PINK Heidi Swapp mirror bird for just the right project. 
Loved how it added a special touch to this banner piece.
I have had this old Valentine postcard in my stash for a while as well. 
So glad the cute Valentine girl found a special place to be enjoyed year after year.
 Those awesome felt roses were found at Hobby Lobby recently.
I added some Pearl Glimmer Mist to help those roses shine!
 
More K&Co. acrylic pieces shaped and pop dotted to add dimension.
My Tim Holtz Tiny Attacher was perfect to adhering these to the cards.

The base of the banner is is made from large foam hearts I found at Michaels for $1 each.  They already had the glitter around the edges and were just begging to be made into a banner. The adorable rag material banner was also bought at M's this season.  

I used a Martha Stewart punch to make the white lace border on each.  The red ric rac is actually foam that is glittered that I bought at my LSS.  How awesome is that ?  I bought it in every color they had it in.  I cut it in half to make it look like a cute scallop on the bottom of each BINGO card. 

This went together pretty quick and I love how it looks....alll that PINK, RED and WHITE really makes it feel like Valentines Day at our house.  Not too fussy...just the right amount of LOVE shown.

Do you have a special item that you put up at your house that shows your Valentine some LOVE?

Friday, November 27, 2009

As We Gather Together

November has been a loooooooooong month and I just haven't made time to blog. Sorry blog followers.

I spent a lot of time in the Transplant ICU helping take care of my dad who had a tumor removed from his liver including cutting out entire right side of his liver and was in the hospital for two weeks. It was so hard to see my dad so weak and in pain. You just never think that your dad will ever be like that. Wishful thinking on the part of all daddy's girls I think.

Happily, dad is recovering well and we were so Thankful to have our family together this Thanksgiving. Bianca came over the day before Thanksgiving and helped us decorate and set out our special Turkey place cards we made last year.


I did find some time this month for a little bit of "scraptherapy" and created a "GIVE Thanks" Banner. The pictures are not the greatest but you will get the general idea. Loved using a mix of wonderful fall papers from some of my favorite manufacturers.


I took some close ups of the banner and will post latter this week for those that want to see it.
Hope everyone of my friends had a wonderful Thanksgiving with your family. Enjoy the rest of your long weekend.

LinkWithin

Related Posts with Thumbnails