Thursday, July 21, 2011

My Favorites so far from the Craft and Hobby Association Summer Show

While I did not get to attend CHA this year, I have been closely following a few of my favorite companies new releases.  I also love to get inspiration from how each manufacturer decorates their booths to showcase their products to the best advantage.  One of the best displays I have seen so far posted is from the fabulous designers at DCWV....take a peek at this awesome detail !  Can you spot all the places they used PP?
well, do you see all the pattern paper opportunities in this display?  I love the deer above the mantel...but the paper wrapped logs are beyond clever !  The stockings, frames and mantle decor are all made with lovely DCWV patterned paper and the cute little sleigh is also beautifully done up in patterned paper.

Another thing I spotted as I blog hopped through CHA photos today was this awesome display of kits
to make fantastic flower necklaces from Ruby-Violet ..a Prima spin off line.  I can not wait to get my hands on a few of these kits.  I wonder how much they will be priced? 

Well I bookmarked a few other favorites that I will post later this week.  What have you seen from this CHA you really want to get? 

Saturday, July 16, 2011

It's A Wrap Blog Hop

Welcome to the It’s a Wrap Blog Hop hosted by Cool Beans By L.B.
Do you like to receive gifts? How about give them? Well this hop is all about the outside…the wrapping; Gift bags, boxes, baskets and more. There are several wonderful stops on this hop and
we hope you will take some time to stop in and see everything we have created to inspire you.  

You should have arrived here from, CoolbeansbyLB , which is the start of the blog hop.  

Here are a few different gift wraps I have made lately for special events: 

There is one thing I am always needing when a birthday rolls around and that is a gift bag for the present.  I like to stock up on plain colored bags in bulk from local craft store and keep on hand to create a unique gift back to fit the occassion and person.  Most of the time I use my Cricut to make adorable die cuts in birthday themes.


All the designs for this project were created using the Cricut Birthday Bash cartridge. The big birthday cake on the bag was cut at 7 inches, the yellow cake base cardstock was embossed with the Cuttlebug, and I added some yummy frosting using Martha Stewart chunky white glitter. I even used foam dots to pop-up the birthday word.


Here is a close up so you can see the details better.

I made a matching mini birthday card as a tag using the cake card shape on the Birthday Bash cartridge cut at 5 inches. I added some "paper sprinkles" to the icing and highlighted them with stickles.

I also like to personalize the gift bag with a monogram, like I did here for graduation presents for a couple of special friends daughter's high school graduation. I used the colors of the college they would be going to in the fall as inspiration...they loved them !


But I don't stop at just making gift bags...I LOVE to make pillow boxes for gifts too.
I recently went to a wedding and made this as a bridal luncheon gift holder.  The bride thought it was so pretty she didn't even want to open it  to see the handmade cards that were the gift inside.

I made the box out of a shiny cardstock that I don't remember the name of but have had laying around for a long time by using a template. Then added ribbon trim to the edges. For the tag, I glimmer misted a manila tag, punched the edges with my Fiskars Apron lace punch. Stamped a frame and hand lettered the brides name. And then added a Prima flower that I glimmer misted in pearl. I tied it onto the package with some sheer ribbon.

Thanks for stopping by on this fun hop. Leave me a comment to let me know you stopped by please.
Your next stop on the hop is Cindy.

Friday, July 15, 2011

What an honor !

My "Splish Splash" Layout was chosen as

on the Cricut Circle Blog today !
Thanks PC for picking the layout. I love it too! \
P.S. Our resident silly 8 year old was thrilled to see herself on the blog today ! That kid is such a ham :)  

Thursday, July 14, 2011

Splish Splash !

I absolutely love ECHO PARK's  paper collections. They are definitely one of my favorite paper companies. If you haven't checked them out, you really should do so.  Their paper is a wonderful quality and their paper collections are a great mix of patterns and paper embellishments plus at a great value. Can't ask for more in a perfect scrapbook paper line. 

When I bought the Echo Park Summertime  paper line the colors just SCREAMED summer to me. And as luck would have it, I had the perfect summer photos of Bianca learning to swim to use with it. 

I used the Cricut H20 cartridge for the titles, pool floatie and girl.


I matted the title and a focal point photo and used a Ranger Inkado
White Pen to add faux stitching. I cut the sun shape out of two different colors
and popped dotted one over the other for added dimension.
 I then added a hidden Echo Park journaling
card sticking out of the top of one photo. 

The pool float and girl were made separately and then
I just slipped her into the horse floatie.
I used my COPIC Markers to color her skin. Love how it turned out !

The H20 cartridge even had the perfect Jumpin! word phrase
to match my photos.  How did they know! LOL

This is a fun, colorful layout that really helped make these pictures come alive. I just love scrappin' summer photos, don't you ?

Wednesday, July 13, 2011

Cindy Loo Magic...

I just love the Cindy Loo Cricut cartridge and try and use it any chance I can get.  Lucky for me, I stumbled across one photo I had not scrapped from when I was the design team lead at a local scrapbook store. Sadly that LSS has closed but the memories still remain. We had a fantastic time at the National Scrapbook Day Crop that year and took a photo of everyone in front of the store.  Our store colors were black and pink so I used those colors on my layout.

I created the frame and flourish using Cindy Loo.
The title was made using Gypsy Font.

The flourish is a layer on the frame.
On a separate piece of paper, I made the flourish layer
and then added stickles over the top.
I love how it turned out and added a bit
of glam to the layout.

It's so sad that many of our LSS have closed. I do my best to support LSS whenever I travel. I think the LSS helps keep our favorite scrapbooking hobby going and we need them.  I encourage you to also support LSS wherever you travel too.

Tuesday, July 12, 2011

So Beary Cute

Well, as many of you may know, I make alot of layouts featuring my silly granddaughter, Bianca.  She is a happy, joyous and creative 8 year old and an endless source of photo shoots. Over the winter we were at my dad's house and she started hamming it up so of course I had to capture her silliness once again.

Here is a layout I made using Twinkle Toes Lite Cartridge. 
Bianca is fascinated with my dad's Grizzly rug.
Here she was making a "BEAR ANGEL" instead
of a snow angel. Silly, right?

I used Twinkle Toes Lite Cartridge to
make this adorable bear.
I tried to mimic Bianca's shirt on the
skirt of the bear using Copic Markers.

On the title I used some pretty half dome pearls in pink
to add a feminine touch.

Monday, July 11, 2011

Fixing Up The Place

Here is a layout I made using the Handy Man Lite Cricut cartridge.  This cartridge had perfect images to enhance the story I wanted to tell about helping my dad build his new house.

To add a little special touch to the title
I used Tim Holtz Tiny Attacher staples

This Handy Man Lite Cartridge even had an adorable
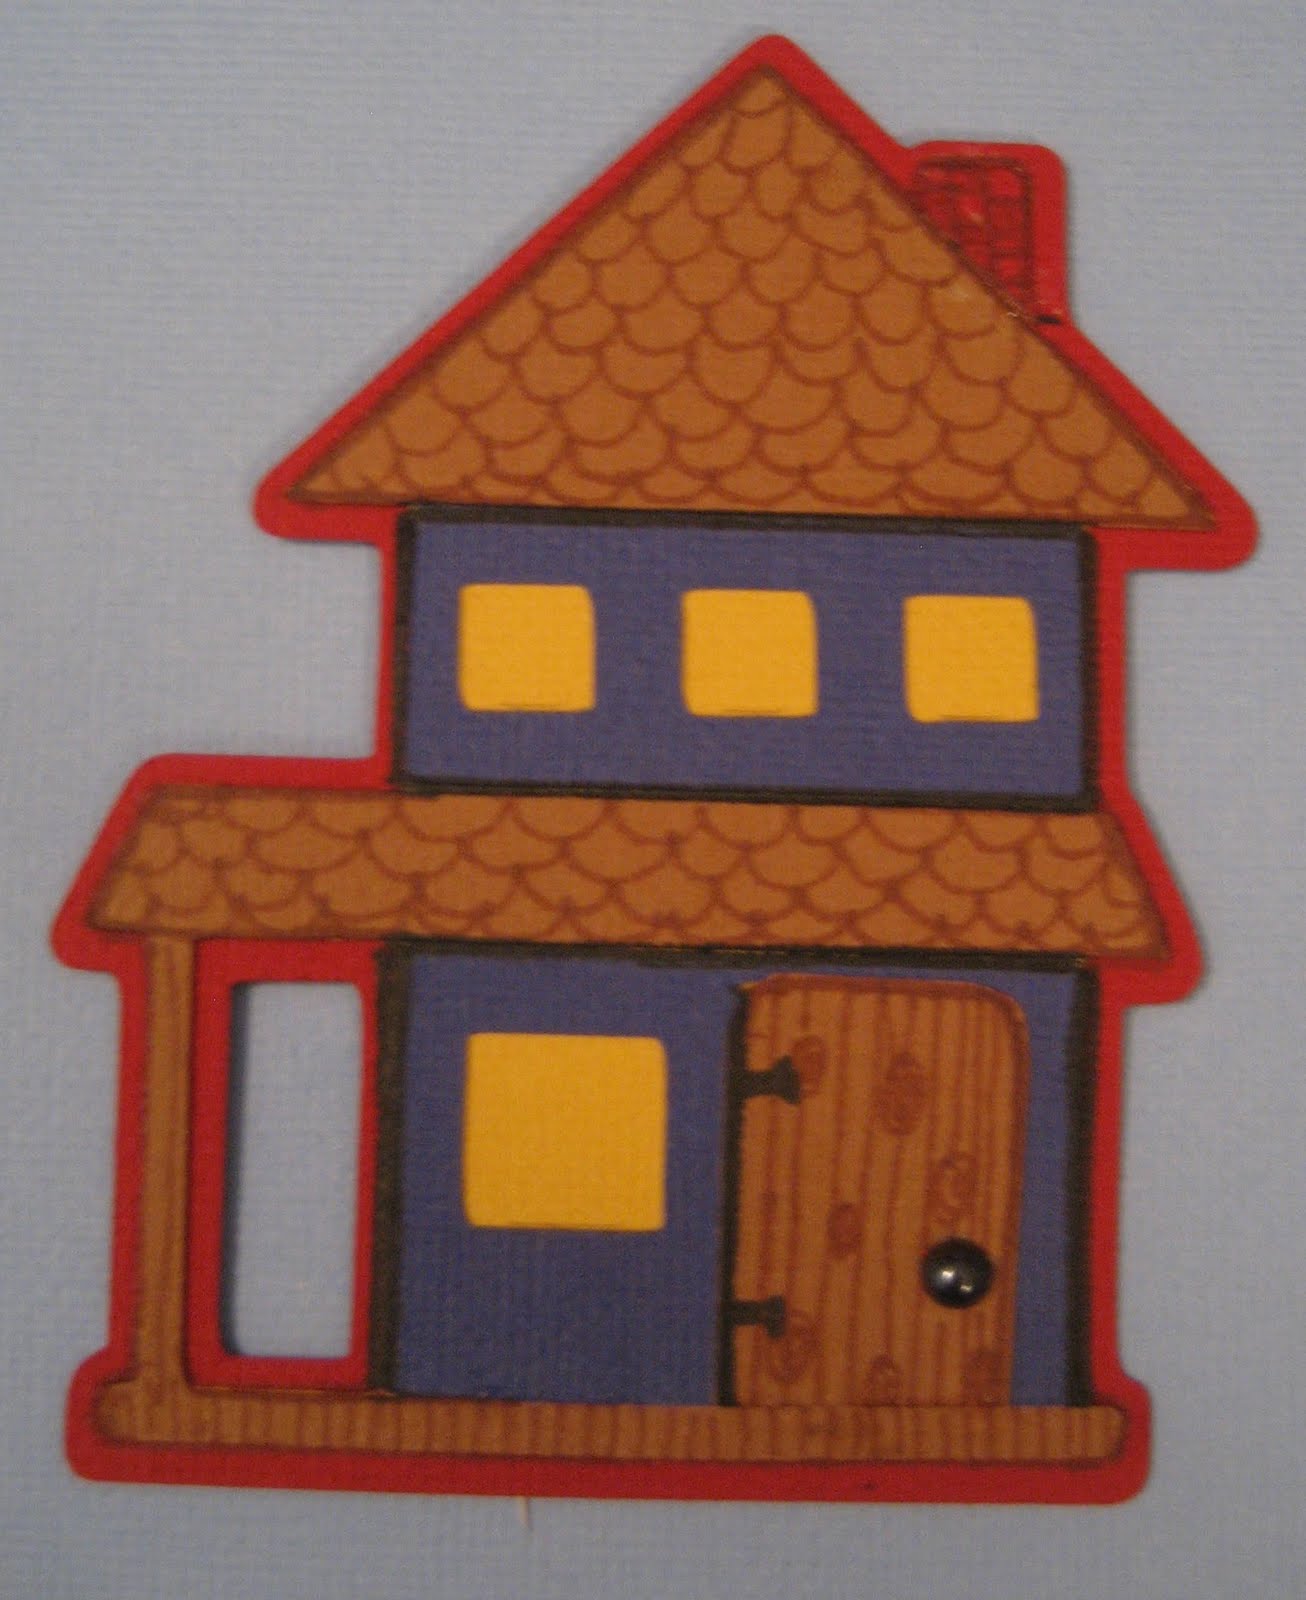
house that looked similar to my dad's Victorian house
we helped him build.  I added some details to the
die cut using Copic Markers and black dome dot
for the door handle.

I used Fabulous Finds cartridge to make a clipboard
just like the one my dad used to keep track of
building the house.  The yellow journaling notecard
was perfect to make the checklist.

 My daughter and granddaughter and I had gone over to help  my dad with the painting on the inside of the  house.  We had a great time together and it was fun to help.  My dad's new victorian house turned out gorgeous! 

Wednesday, June 29, 2011

Welcome Summer !

Well, you know it's summer when I am too busy to post on my blog! LOL.  Been keeping the granddaugther so we have been busy crafting, watching Disney movies and such. Don't know where the days just slip away.

My dad had two surgeries this month, happy to report he is recovering well from them but it has taken up some of my time as well.

And my Scrapbook classes at Michael's have been doing great and also taking up a bit of my time each week as well.

However, this past weekend I was able to sneak away for a 4 day scrapbook retreat at Elm Street Crafters Retreat in Denton, TX.  It was a lot of fun and the place was fabulous !  If you are looking for a retreat place, definitely check this one out. Very comfortable crop room, comfy beds and great food...you can't go wrong with that combination.  And the owner, Penni, is super sweet and funny !  We adopted her immediately in to our group as one of us.  Next time we go up there to her place, she wants to take time off from work and do the weekend with us as a crafter since we really hit it off with her.  She has been open since January and this is her dream.  So far, she is making this our dream place too !  Thanks Penni.

Here are a few pics of our group thanks to the photgraphic talents of Crystal Kovach.


Bottom Row LtoR: Melissa, Crystal, Mary
Top Row LtoR: Me, Katie, Amy, Melissa, Lis, Jill, Lindsey

Even with a margaritas machine (thanks Lindsey) running round the clock, we all still got a ton of scrapping done. Or maybe that's the reason we got that much done...LOL.  Check back tomorrow and I will post some pics of my retreat weekend creations.

Friday, June 10, 2011

This ones for Pam....

There is a hotties thread on  the Circle MB tonight {yes, we are silly women with nothing else to do on a Friday night}....my friend Pam posted a young male movie star as her hottie.  I don't know about ya'll but I like more grown up men...those that shave daily and have gorgeous, rugged good looks. 

So Pam, here you go.....this is what a REAL HOTTIE looks like....

I ask you......
Who in the world doesn't think that HUGH JACKMAN is a HOTTIE ?!?!?!?!?! 

Tuesday, June 7, 2011

Daisy Crazy....

Recently I went a little 'Daisy Crazy" making some items for a family member's bridesmaid luncheon that we attended over the weekend.

We wanted something to go with the daisy centerpieces for the luncheon tables to liven them up a little so I came up with making a placemat for each arrangement using Elegant Edges daisy shape cut at 10.50 inches.

To give them stability, I cut a solid daisy shape out of white cardstock, then the daisy cut out using shiny yellow cardstock, then the green polka dot is scalloped circle for the center. To match the polka dot theme, I then cut the daisy cut out using white cardstock and kept the petal center pieces only. I used the cuttlebug to emboss with the polka dot embossing folder to give them a little more dimension and then glued on each petal.


Next came the idea to make some matching "daisyfetti" using the the Cricut Quilling Daisy...after making a 100 of these, I am now a quilling pro !  They sure looked pretty scattered on the tables around the arrangements.

Here is a close up of a few of the daisys.  I kept the yellow theme going but used different shades to give them more detail. I love how the polka dot leaves really livened them up.

Most importantly, the bride was really happy with them since she loves daisys. 

I haven't downloaded my photos from the wedding events yet but will post pics of the entire table so you can see how they looked.

Friday, May 13, 2011

See Why They Call Me ScrapHappyDeb

Ever wonder why my MB name is "ScrapHappyDeb"?
My DH took this picture tonight of me in my scraproom tonight for a contest on the Cricut Circle Blog that requires we submit a picture of ourselves in our scrap rooms. 

We decided to ham it up a bit...I am wearing my "signature crown",
surrounded by some of my Cricut machines including my new E2 while
reading my inaugural copy of the Cricut Magazine.
Sadly my Cake Machine, YUDU and V1 didn't make it into the picture. 
Now all I need is the IMAGINE
so I can have a complete and happy Cricut Machine family !

I have decked out my adorable Cricut Plushie in his own Scrap Apron courtesy of Build A Bear!
He loves being right un the lovely Circle Scarf serving dual duty as wall decor. 
Since we are here, why don't I give you a little tour of the place that makes me so happy.

When you walk into the room, my scrap space is just to your left.
I use an old oak dining room table that seats 8 for my scrap table.
It's perfect for having friends over to scrap or
when I want to really really spread out myself !
In this picture you can see my inspiration station with projects and magazines,
my cutting station with Cricut and Cuttlebug stuff, cricut cart storage and ribbon storage.
If you scan around to the right, you will see my Stamp Station,
my Paper Station and My Small Embellishment Stations.
Here's a few close up shots and explanations method to my madness...
I store all my patterned paper sorted by manufacturer and kits
in 12X12 plastic sleeves in assorted baskets.
This makes it so easy to find just what I want.
I keep all my most current scrap buys in a 12X12 rolling hanging file bin under the scrap table.
All my small embellies I store in jars on this shelf.
Buttons, brads, fabric brads, metal tags, decorative pins, etc.
And hanging on hooks form the bottom is my extensive
Flower collection sorted by color in hanging bags on binder rings.

Here is how I store my large ribbon collection.
As you can see, I have sorted my ribbon by color, type or theme by attaching
each piece on a safety pin hung on a large binder ring. 
Each large binder ring of ribbon is then suspended from a smaller ring on the rod.
The rod is just threaded through the shelf brackets above.
This system works great for me...I just unhook the large binder ring from the smaller ring
of the colors I want to try with my project, snip off what I want and then hang
back up on the smaller ring.  This system cost me about $5 total.

Here is my stamping station. All my inks, glimmer mist, 
Paint Daubers, Acrylic Paints and stamps are stored here.
I have a nice hard wood shelf that DH extended for me so
I have plenty of room to stamp and clean up here too.
Most of my stamps are acrylic so I store in CD cases.
Here is how I store all my many Cricut Cartridges.
These are large size Snapware containers with two tiers each.
   I just expanded into my third Snapware container system for my Cricut Cartridges. 
I love this system but I changed it up a bit from other's I have seen posted. 
The top tier holds the booklets divided by alpha.
I have plenty of room to add more to this A-F Set.
For now, I am storing my E2 & Imagine carts separately
from my regular Cricut Carts.
On the bottom tier, I have placed 4 drawer dividers I bought at the $ store.
I used plastic needlepoint canvas to make a few dividers I slid between slots.
This gives me room to put 5 carts in each section and they don't fall over
when I take them out of their spot and makes it easier to replace them.
As you can see I have about 34 carts in this bin so far and
room to expand to up to 60 if needed.
On the tall shelf, starting at the top:
 1) my extra trimmers and MS Scoring board and misc blank albums
2) Stacked boxes to hold my bling, all my Thickers in big box
3) Small Sterlite bins hold my journaling cards and epherma, twine,
 doilies, gaffer tape, etc. I have my heat gun and ribbon iron on top.
4) Small Sterlite bins hold envelops, tags, bingo cards. 
Large bins hold Rub Ons, Large Bling sheets,
 Metals, Stickers, Mini Alpha Sheets 
Rest of that shelf unit
5) All my cardstock, sorted by type and color
6) Specific Scrap Items sorted by Holidays in 12X12 Bins
  And last but not least is our BIG SCREEN TV...woohooo....I can scrap and watch chick flicks too !!!

I do share this very large bonus room with my DH. His geneology area is on the right of the room when you walk in but it is just a big desk with a wall of shelves with boxes and boxes and boxes of Geneology stuff in them so not really worth showing you.

Now do you can see why I am "ScrapHappyDeb", right? LOL  I love all my yummy scrap stuff and spend
most of my free time in this room creating.  Hope something you see in my room inspires you !

Tuesday, May 10, 2011

And the Grand Prize Winner is.....

Thanks to everyone who participated in the
Our Blog Designers really out did themselves with all the fantastic projects they posted for the hop ! Thanks to each of them for sharing their talents with us.  It was truly amazing to see all the different ways everyone uses their Cricut to make projects.

After spending a bit of time going through all the blogs and making sure "a little love" was left on each bloggers site, we finally have a Grand Prize Winner to post.......

Congrats to KRIS DIETZ 

You win the Mother's Day Bouquet Cartridge PLUS some other fabulous SURPRISE SCRAP items
that I will include in your prize package !!  I will email you for your mail addy.  

Thanks again to everyone who hopped along with us.  Hope each of you had a Happy Mother's Day celebrating with the ones you love and found inspiration in our Blog Hop.

Friday, May 6, 2011

Thanks Mom Blog Hop Starts HERE


Welcome to the "Thanks Mom" Blog Hop. Thanks for joining us. We hope you enjoy all the wonderful crafty inspiration in honor of mother's everywhere from the talented designers in this hop. 

Besides loads of awesome Mother's Day projects to inspire you, I am also offering up a Blog Hop Grand Prize to one lucky winner.  Just leave "a little love" {ie. a compliment about their project} on every Blog Designers "Thanks Mom" Blog Hop post.  Then pop back to my "Thanks Mom" Blog Hop Post on this thread and leave me a comment that you posted on all blog hop designer along with your email address  to reach you.  I will will draw and post a winner on Tuesday, May 10th here on my blog.

Oh, you want to know what your prize will be?  LOL  Hang on to your Mother's Day bonnets ladies because you can win your very own
Mother's Day Bouquet Seasonal Cricut Cartridge
Woo hooooo!

Alright, time to kick off all the inspiration by sharing my project...{don't forget to leave me some "love too" pretty please} :

I made this adorable Tri-Fold Gift Card Holder to give a Mom so she has a little extra little spending money...who wouldn't love that !   

I used my new E2 and the two exclusive Just a Note and Cricut Alphabet Cartridges to create the tri-fold card.  I cut the card at 5.50 inches.

I added the word "Mom" to the inside of the card with the Cricut American Alphabet cartridge
and outlined the lettering with a white ink pen.

 On the inside of the card, I added a pocket and placed the gift card in the pocket. I added a tab so Mom knows to pull the gift card out. I also cut out the "I HEART You" with the Cricut American Alphabet cartridge. Again, outlining with white gel pen.

Now the card is ready for a signature and to make Mom very happy !

Here is the list of all Blog Hop Designers for you to visit. 
If you loose your way along the hop, come back here to pick up the hop again.  

1. Debbie  Deb's Eclectic Thoughts - START OF HOP
3. Dawn    ScrappyRn
4. Chrissie  Chatterscene
5. Cindy  In Love With Paper
7.  Paula Owl Be Scrappin
8. Maria  Stamp Cut Create
10. Heather  Houses Built of Cards
11. Jami  The Paper Farm
12. Dana  Paper Memories
13. Claire  Cricuty Doodah
14. Jenny  Scrap With Jenny
15. Lauren All Things Crafty
16. Cassie  Scrappin Palace
17. Stefani  Styles By Stefani
18.  Heather  Paper Crafters Anonymous
19. Darcy Time 2 Create
20.  Kelly  KBien Designs -  END OF HOP

Don't forget to leave some "love" and then come back here to comment for a chance to win the Mother's Day Bouquet Cricut Cartridge.

Your next stop is at the fabulous Brenda's Blog HERE

Tuesday, May 3, 2011

Girls Rule {Enough Said!}

As many of you know, I have a granddaughter who I dote on and who loves to scrapbook with me!
She is now 8...time sure flies....and is at that great age where to her all boys are truly yucky and gross.
{Nonny says "Good girl..keep thinking that for a while longer!"}

Anyways...one of her favorite sayings is

Over the past year she has insisted we buy her buy t-shirts, cups, ball caps and even tote bags with this saying on it so I know I had to make her this sign for her bedroom door when I saw it on a cartridge this weekend! 

It is printed from the Imagine Best Friends Cartridge at 10X10, then mounted on cardstock on top of a  12x12 piece of corregated cardboard so it would be lite enough to hang on her door.

{thank you Justice for Girls for encouraging this sentiment and keeping our girls "little" for just a while longer}....and thanks for my friend Kelly for letting me print it out on her Imagine!

Look What a Friend Made Me !

I hosted a Pre-National Scrapbook Day Crop this past Saturday for about 20 wonderful scrapper friends.  We had so much fun!  Lots of scrapping, lots of talking, lots of laughing, lots of sharing inspiration with each other.  In fact, I had so much fun that I forgot to take pictures !  I know, unbelievable, isn't it!  LOL

I do have pics of a wonderful present to share with you that Charlotte aka Buggin' Out was kind enough to make me as a hostess thank you gift.  I just LOVE IT !!!!


Is this not just the cutest thing ever?!  And it was even filled with all kinds of bling and flowers !
Thank You, Thank You, Thank You Dear Charlotte !!!!!!!!! 

LinkWithin

Related Posts with Thumbnails