Showing posts with label My Projects. Show all posts

Tuesday, August 7, 2012

MEET ANGELINA ...an adorable Movable Monster

There is a new Cricut Craft Room Exclusive Digital Cart called "Movable Monsters".
 As you can imagine after taking one look at these Halloween images, I was more than willing to "test drive" the Movable Monsters and create one for you all to see. There are several monsters to choose from: Skeleton, Frankenstein, Bride of Frankenstein, Witch, Cat, Scarecrow, Dracula and a Zombie.

All the monsters are made in pieces so you can add brads to make their body parts movable which is so fun. Unfortunately, the digital cart doesn't have any instructions so putting this together was a bit of trial and error but I think it turned out okay. You can cut the images at any size but I choose to make my monster a total of 4 ft tall.

So... INTRODUCING ANGELINA - She was created as a DATE for Skeleton Brad who was made by another Cricut Circle member.  
Hanging about 4 feet tall, she was cut at 12" for each section of her
skeleton body out of white poster board. I outlined her bones with a
Spectrum Noir EB1 Alcohol marker to add a little more dimension.
The bone shapes were attached to each other by using white brads.
To make her a little more Girly, I used pink glitter paper for her "insides" and accessories.
And of course, I had to bling her up a little bit too with some rhinestones since she was
going on a DATE ! Her crown and heart were made using Create A Critter.
Her purse was cut from Forever Young at 4" and highlighted with
Spectrum Noir BP6 Pink marker.
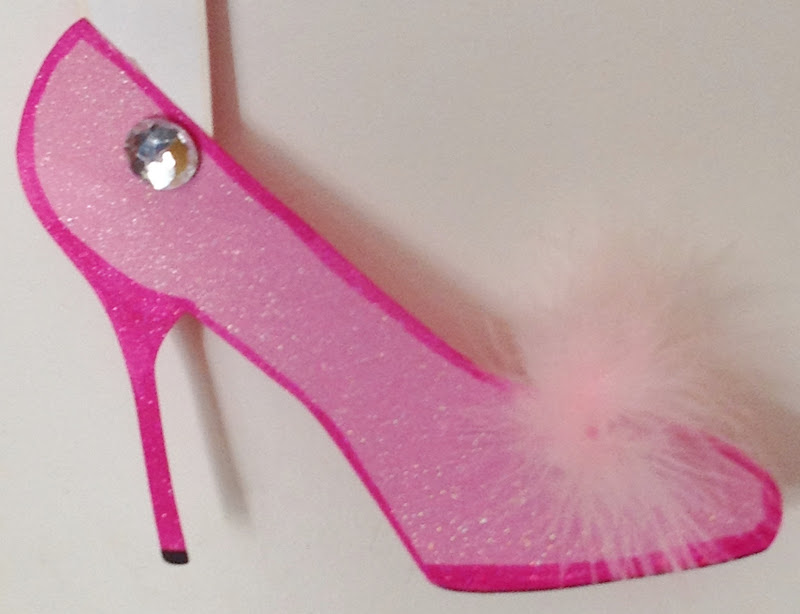
And her fab-u-lous Shoes were also cut
from Forever Young at 6". I added a little fluff to the toe
and again highlighted with Spectrum Noir BP6 marker.
And since no girl would go on a date with out getting their nails done,
I did her nails with Spectrum Noir BP6 marker.
Plus added a bracelet with some rhinestone mesh cut to fit her wrist.
Well, Angelina is ready for her date with Skeleton Brad, I hope he shows up or she
will be crushed after all the trouble she went to get dressed up for him :)
CRICUT INFO & SUPPLIES USED:
Designed by: Debbie O'Neal
Cricut Machine Used: E2
Cricut Cartridges Used: Movable Monsters Digital, Create A Critter, Forever Young
Other Supplies Used: White poster board, pink glitter cardstock, Spectrum Noir Markers,
Rhinestones, Brads, Googly Eyes, Feather Boa, Adhesives

Tip: To super-size the monster, I used the 12X24 Cricut mat and cut the posterboard to fit the mat since I didn't have any of the 12X24 paper pads on hand. I bought the poster board at a local craft store. I recommend you use either a Gypsy or Cricut Craft Room to help you fit the most images on the mat to save cutting time. To maximize your space, you will need to turn and move the images around on the mat. Just don't flip the images or they will come out backwards and be hard to fit together with the other pieces. For the pink glitter pieces, I used 12X12 standard glitter cardstock and a 12X12 mat. I did move the bones pink layer images around on the mat slightly to be able to fit the entire 12 " size.

Wednesday, June 13, 2012

DCWV/May Arts Craft Challenge Entry

Well, the day is finally here.  I can share with you my entry for the May Arts/DCWV Craft Challenge. To recap, we were asked to submit a project idea using DCWV Snapshot Stack and some lovely May Arts ribbons.  Then Erin of DCWV and Betheny of  May Arts selected 25 of the ideas  and sent us all the products to create our project idea.  Mine was one of the ideas chosen ! !

The DCWV Snapshot Stack papers had so many great patterns and elements that I was inspired to create a "Family Photo Wreath". With the recent addition of another granddaughter to our family,  I decided to focus on celebrating the grandchildren in our lives.     
 To make the " wreath base", I covered a flat pressboard circle I purchased at a local craft store with strips of the Typeface patterned paper from the stack.  


To create each "photo spot" , I cut out the glittery Polaroid Images and matted them on the glittery Red Paper from the Snapshot Stack. Using some of the  gorgeous black lace ribbon from MayArts, I added a strip to the bottom of each "photo spot" to add more texture. Next I cut some of the elements from the paper stack page and added a little heart and a photo turn to each with a brad and a "name banner" made from printing on the Green patterned paper.  I covered the back of clear buttons with different pattern paper punch cuts, pierced the holes and tied the MayArts Twine into a bow on each and used foam dots to adhere to each  "photo spot".


I added photos and also a heartfelt saying about grandchildren printed on paper from the stack to finish off those pieces. 
I made additonal embellishments for the wreath using 2 sizes of scalloped circle punches and either the MayArts Yellow Chevron Ribbon or the Black Lace Ribbon and more of the paper backed clear buttons tied with the twine bows.

The "FAMILY" embellishment was created taking the FilmStrip Paper image, lightly misting it with water on the backside and bending it to form gentle curves so it looks like it is unfurling. I then die cut letters out of the glittery Red Paper from the stack and adhered all to the wreath base. 
The "Banner" was made by taking various elements from the paper stack and building each banner piece including making banner pieces from the Yellow Chevron ribbon and hanging all from more of the MayArts Twine.

And in my opinion, you can't have a wreath without a big fluffy bow, so I used the beautiful May Arts Sheer Ribbon  and layered it with some of the  Yellow Chevron and Black Lace Ribbons for more interest and topped it all off with another handmade embellishment from the patterned paper and paper backed clear buttons and twine and Yellow Chevron Ribbon.  
I also made a wreath hanger from the Yellow Chevron ribbon and taped it to the back of the wreath.  This was a fun project to make and now I have a lovely home décor project to honor the happiness our grandchildren bring us.
Thank you DCWV and May Arts for giving me a chance to make this project idea a reality!  On Friday, June 15th we find out who wins prizes for their designs on the DCWV Blog.  I'd appreciate it if you would drop by the DCWV Blog and leave a comment about my project.  

Wednesday, May 23, 2012

The Box I Made My Secret Swap Partner

I was so relieved yesterday when I got word from my Secret Swap Partner, GrannyAnne, that she LOVED the box I made for her.  I worked really hard to create something beautiful that she would enjoy sitting around her craft space or even in her bedroom for jewelry, etc.
                               We all started with this plain cardboard box from Cricut.com.
                    You could then alter it however you like to match the desires of your swap partner
                 who had filled out a little questionnaire about their wishes for box and scrap goodies.
                                                                        
Here is the top of the box I made.
I painted the box white, added layers of papers
that I had inked up.

Then added lots of pretty lacy flowers, pearls and doily for the top of this garden inspired box.
And to personalize it for GrannyAnn...I added a glittery "a"
Side view of the box.
More layered, inked papers were added and some pearls too.
I even added painted wooden feet to give it the feel of
a little jewelry box.
I also decorated the inside of the box
using more inked papers.
                                                  And of course, the inside of the lid too !

Note: I used ModPodge on the entire box to paste on the
papers and then to seal them. It gave the box a slightly shiny matte finish
that added to the overall loveliness of the box.

Then the box was stuffed full of goodies for GrannyAnne...

Flowers, journaling spots, buttons, twine, brads, paint daubers,
metal charms, labels, trims, ribbon, paper pad. Plus a little
birthday surprise since her special day is coming soon
that included a birthday stamp, bling, flowers and a rhinestone pin.
And of course, a little chocolate treat too!

Well GrannyAnne...so glad to have had you as a Secret Swap Partner. 
Can't wait to see what you make with all the goodies I crammed in your box !


Saturday, May 12, 2012

Happy Mother's Day Ladies

I want to wish all the wonderful Mother's out there a very Happy Mother's Day.  Hope your family treats you especially extra nice. We are celebrating with my Mother in Law and Daughter at our house this year.  Hubby is grilling up some Shrimp Tacos for lunch...yummy !

I made a few things this year for Mother's Day gifts..can't post those cause the special ladies haven't opened them yet, but I did want to share two of the cards I made to honor the special mother's in our life.

this card was made using a doily that I glimmer misted pink,
then added some distress ink to it to mimic the vintage
feel of the My Minds Eye patterned paper I used.
I made the flowers out of paper roses, inked and added leaves.

this card was made with some pretty patterned paper
as inspiration. Again, I added a doily but only distress
inked it.  I did distress ink and glimmer mist the sentiment.
And I loved added the pretty antique lace trim I had in my stash
to this card as well.

Hope each of you have a wonderful Mother's Day...whether you are being celebrated Or
you are celebrating a special mother in your life. 

Friday, May 4, 2012

Just call me HOP ALONG

No, it's not another blog hop I am in.  I actually hurt my left knee pretty badly after the MS150 weekend and have been having to take meds and rest my leg.  Luckily the xrays did not show a tear in my LCL, just a severe sprain.  Who would have thought a little twisting of my knee in the wrong direction could wreck such havock ??

Last weekend I hosted a Pre-National Scrapbook Day Crop for about 24 ladies.  We had a blast but it was a bit challenging getting ready for it.  Thanks to some of my dearest friends, I was able to stay off my knee most of the day...thanks ladies for your help !

I had planned to post some pictures of the crop, however, because I was grounded with my knee propped up on a chair all day long, I completely forgot to take any photos of the event.

The only picture I have to share is of the Matchbook Style Paper Bag Mini Album class that I taught in the afternoon of the crop.
I will post a few more photos later.  Blogger is taking forever to upload today.

While the knee is a bit better and the swelling has mostly gone down...I am still kind of Hopping Along on it....if it isn't better next week, I may have to go see the orthopedist.  Praying that doesn't have to happen.

Well, just wanted to check in. Be back later with more project photos.

Wednesday, April 4, 2012

Fun Post It Note Holders

I made some fun post it note holders for a few gifts for friends recently.  They were so easy to make but a very useful gift too.  Wanted to share now since with Graduations, End of Year Teacher Gifts, Mother's Day and Father's Day coming up it might spark some creativity in you !

This is a 4X6 Acrylic photo frame I found at the craft store.
I cut a pretty piece of scrapbook paper to fit inside instead
of placing a photo. It also holds a post it note pad that I used
double sided tape on the back to make sure it held well.
And there is even a pen attached to the frame
for fast note taking.  I hate it when I can't find a pen, don't you?

I added the pen by using sticky backed Velcro
I cut into thin pieces to fit on the pen, then the opposite
side on the frame. Works great!.
To embellish the frame, made a Monogram
with the receivers initial using a
rhinestone sticker alpha on a punched
piece of cardstock, then layered on top
of some stacked flowers.

I also added some crinkle ribbon tied in a
bow to the top of the frame for some added pizzaz !
The front of the ribbon is on the outside of the frame but
the backside of the ribbon is actually placed inside
the back of the frame to help hold it in place.

Hope this easy project inspires you to come up with a cute, inexpensive but useful gift for
your upcoming gift giving occassions !


Thursday, March 8, 2012

Kiss Me I'm Irish !

I am hosting a Weekly Cartridge Exploration Challenge on the Cricut Circle Message Board. This week I chose to  use the Art Philosophy cartridge by Close to My Heart.  This cartridge is so awesome...lots of great images on it, a wonderful font, cards, tags, borders...you name it and this cart has it. 

With the last name of  O'Neal for our household, we hold St. Patrick's Day dear at our house so I decided to make myself a new pin to wear using Art Philosphy.
I used the tag feature for the background. The white
paper is actually white cardstock that I embossed
with the Simply Charmed Embossing folder with
Shamrocks on it. Then used antique ink over some of the embossed images
and added glossy accents over the top.  Other images have
Perfect Pearls rubbed over the top fo the embossing.
The stripped Shamrock is cut out of DCWV glitter paper
and outlined in Golden Rod Stickles and popped dotted up.

The lettering is also cut from Art Philosophy and gold
stickles added for some shine.  The tag is inked with antique gold ink.

I can hardly wait for St. Pat's day now so I can wear my pin !!!!! 

Thursday, March 1, 2012

Farewell to February...but first, one last project :)

February seemed to just fly by...didn't it?  I wanted to share one last project I made in February with you.

I was in a Valentines Swap with two nice ladies on the Circle MB and I made them some gift bags with treats in them...

I used Victorian Romance cricut cartridge for these
beautiful cupid layered die cuts.
I added the heart shaped doily, the Love word, a
heart stick pin and a felt rose flower I made to further
enhance the Victorian valentine theme.

I made them each a gift bag use the die cut shape.
I love how these turned out !

Wednesday, February 22, 2012

What's Black and White and Pink All Over????

WHY A ZEBRA OF COURSE !! 
My youngest daughter is having another baby girl on March 24th.  Yeah !  Another granddaughter to love !!!
She chose a Zebra and Hot Pink theme for the nursery.  It is so pretty together. 

Her best friend gave her a baby shower this weekend and I color coordinated my gifts to match the nursery theme.  She loved it !!!

I made the Zebra tags using my Create A Critter Cricut Cartridge.
I even found these adorable Glittery pink Zebra bags at Target
and Zebra striped tissue at Hobby Lobby.

And I made her this adorable card using
New Arrival Cricut Cartridge and
my cuttlebug polka embossing folder for
the white background pattern paper

Here is the "mommy to be" and my
adorable 9 yr old granddaughter. 
She gave the new baby a Zebra pillow pet !  So cute.
She is very excited to be BIG SISTER after all this time :)

Now we just have to WAIT for the little bundle of joy to arrive !!!

Thursday, February 16, 2012

Valentines Day Traditions

Hubby and I usually keep our Valentines Day gifts to traditional type of things but this year, I did something a bit extra fun for him.  

I made this adorable squirrel tag with my Stretch the Imagination Cricut Cartridge
to put on the container I got him to store peanuts on his desk at work to
have a quick snack in the afternoon to keep his energy level up. 
That's what true love is about, right?  Taking care of each other.

He got a big kick out of the tag and the cleverness of the gift.

And my traditional gift from him were these gorgeous tri-colored roses.
They are so fragrant...I just love them and of course the giver more ! 
Most years we just have a romantic dinner at home so we can
enjoy ourselves and not fight the crowds at the restaurants. 
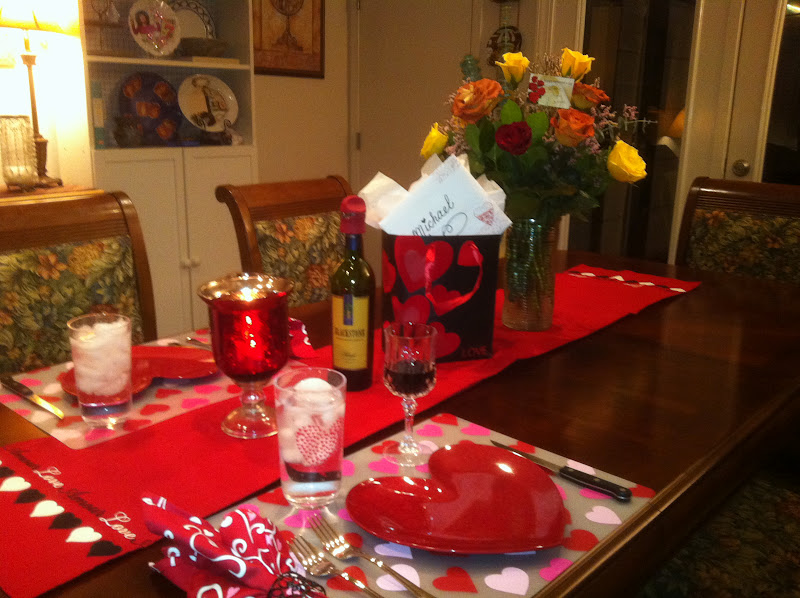
I enjoy setting a pretty table for us to amp up the romance !

And here is my sweetie getting ready to enjoy his
rib eye dinner complete with roasted potatoes, grilled
asparagus, crescent rolls and spinach salad.
A glass of red wine and chocolate covered strawberries tops
off our traditional valentine meal !

Hope you all enjoyed your special LOVE day as well.

Saturday, February 4, 2012

USE YOUR STASH CHALLENGE - LOVE Layout

Still doing the USE YOUR STASH CHALLENGE on the Circle messageboard.  Here is a layout I made using some old paper scraps I had laying around and doily stamps from My Minds Eye I have been wanting to use. I hand cut the heart shapes out of the scrap paper and inked them up some.
I also used a LOVE die cut from the new Victorian Romance cartridge that I actually made
 for a Valentines Day project but was too large...it worked perfectly on the layout instead :)
I just distress inked over it to get the color I wanted.

So what have you created lately ? 

Monday, January 16, 2012

Love is in the Air !

My LOVE for mini albums is well known. And when Valentines Day is only a month away, my thoughts turn to making another mini album to showcase my love.

Today I am the designer on The Bug Bytes Blog and I wanted to share with you the paper bag mini album I made for my 2012 Valentines and Things I LOVE pictures that I will take next month.


Start with an assembled paper bag album using 6 lunch size bags.
If you don't know how to make one, there are a ton of videos on You Tube .
I trimmed mine to 6"X 5 1/4". And covered each page
with Valentine paper from my stash cut at 5 3/4" X 5".

Next I like to make a binding for mini album using
patterned paper cut at 3" X 5 3/4"and cardstock cut at 4"X5 3/4".
I used the Swirling Lace Martha Stewart Border punch
to punch the two long sides of the cardstock and then
adhered the patterened paper on top to create the binding.
I then attached the binding to the side of the paper bag album,
leaving about the size of a pen between the paper bag and the binding to
create a slight gap so the album lays flat.

Once the binding is secured, I then move on to the fun part...
decorating the cover.  Here I used a heart shaped doily,
K&Co Medallion Dimensional Sticker, a Jenni Bowlin Ticket
and a Maya Road Wood Piece.  I then threaded three different
ribbons through the gap of the binding and tied in a knot for a
finishing touch !
Paper Bag Albums are great to add a bunch of
different tags into all the pockets.
I free hand cut some hearts, added some faux stitching
with my journaling pen and attached a heart brad to
create this adorable rotating tag.
On the inside page, I adhered the mini flap on three sides and
left the side opened for the rotating heart tags. 
I will also slip in a few 4X6 photos into this pocket.
On a couple of the pages, I created these half photo
pockets and a journaling tag.
 On one of the little flaps, I adhered some ribbon
to create a holder for a tag.
Here it is with the journaling tag in place.
With a jumbo scalloped punch, some stamps and a heart shaped brad, 
I created another rotating journaling tag for a small inside flap pocket.
I tied some cute ribbon to the little flap pocket and 
placed the rotating scalloped tag inside.
On the last page, I made a pocket and added a tag
using cardstock. I adhered a sticker to the front
and some ribbon.
For the large inside pockets of the paper bag album,
I made large double sided photo mats for each pocket.
Alternating colors between black and pink cardstock, and
using the same Martha Stewart Swirling Lace punch
for the edge that sticks out of the pockets. 
I do love how this mini album turned out with its
pretty pink, red, white and black color scheme!

Thanks for looking.  Let me know if you have any questions about
how I made this.  I am working on more Valentines projects
and will be posting them soon so please stop back by.

Happy Scrapping !
 

LinkWithin

Related Posts with Thumbnails