Showing posts with label Halloween. Show all posts

Wednesday, October 31, 2012

 
Happy Halloween to all of you ! 
Hope you have a Spooktacular and Safe time tonight !
 
 
I made both of these cards to send friends. 
So fun ! I bet you can spot the washi tape and twine I used.

Tuesday, October 23, 2012

SpOOktacular Retreat Treats Anyone?

I am so excited to be leaving at the end of the week to go on a four day scrappin retreat out of town that I am hostessing for 10 of my friends. I know I can use the break and just have some "girl time".  We plan a get away once or twice a year...so glad this one is finally here as we have been looking forward to it for months!
 
And since I just LOVE to spoil my friends, I decided to make them each a personalized Retreat Treat Bag to put at their croppin' space when they arrive.
 

I LOVE the colors of Halloween so I have quite the stash of Halloween paper I have collected over the years.  All of these bags were made from the awesome Midnight Spell pad by DCWV that I already had in my stash from last year, I think.  Their paper weight is perfect for making the treat bags. And the designs in this pad were awesome ! Lots of glittery prints and silver foil on them.
All the bags and SPOOKY black glittery images on them were cut from Teresa Collins Chic and Scary cartridge.  This cartridge has some of the most amazing Halloween images on it. If you don't already own it, you should get it for sure !
 
Project Directions:
The bag was cut out of (1) single sheet of 12"x12" paper with the settings on FIT TO PAGE.  That created a perfect 5" tall X 3"wide little gift bag.  The great thing is there are score lines that let you easily fold the bag shape and you only need a small strip of double sided tape to keep the bag held together.  The various Halloween images I used were cut at about 2" and there then adhered using a foam pop dot.
 
The Trick or Treat tag was made using Tags Bags Boxes and More and cutting the tag out at 2 1/2". 
The stamp is from "Ghouls & Goblins" by Inkadoo.  I used embossing ink and Tim Holtz Distress Powder and then heat set the image. I intentionally "splashed" a little extra embossing ink and powder on the tag to give it a more distressed look.  I inked the edges of the tag using black ink pad taking care to shade the edges. I used some black and Halloween colored Tulle to tie each tag to the bag.
Each bag is different which makes it more fun for each of the receivers.  I filled each with some newspaper print tissue in the bottom, three treat size candy bars and personalized pocket tissues with each ladies initial on hers.
 
Here is a few more of the bags.  I loved how there was a scary woods theme paper with little crows on it...matched the Crow die cut image perfectly ! And of course, Spiders are a MUST for Halloween decor !
 
And since I willl be traveling with these...I lucked out and they all fit in my 12X12 scrapbook case I bought a while back at JoAnn's perfectly.  
 
I do plan on getting quite a few holiday gifts made while I am gone as well as some projects for Scrap Me Quick Designs website to sell so be on the lookout for those soon too !
 
Enjoy your weekend...I know I will !

Saturday, October 6, 2012

Falling for Halloween Blog Hop Project


Welcome to the Falling for Halloween Blog Hop. Thanks for joining us for some crafty Fall or Halloween inspiration.  You should have arrived here from  Renee's i came i saw i created blog . If you missed the beginning of the hop, please go to Maria's blog to start so you don't miss any of the projects.

I am a BIG lover of the fall holidays but HALLOWEEN  is my favorite ! Maybe it is just the thought of the air finally turning cooler or the cute little kids dressed in their Halloween costumes that bring a smile to everyone's face ?  But I really think I have a passion for all the spooky images ...when at other times of the year I don't really like scary things.  And I sure can't seem to resist the traditional Halloween colors of orange, black, lime green, purple together  !

Every year I change up the Halloween decor on our entry hall table that greets people when they arrive in our home.  This year I decided to make a Halloween Table Frame to put along with some other items I bought for Halloween this year.

Using one of my favorite Halloween Cricut Cartridges ever, "Happy Hauntings", I made the frame on page 68 cut at 6".  I did make a chipboard backing and stand first so it is more substantial by using a deep cut blade on my Cricut machine.  Then I did the cuts again using cardstock to cover the chipboard.  The perfect Halloween colored glittery and shiny cardstock is from DCWV Bewitched stack.  The "Happy Haunting" phrase is on page 46 and cut at 1 1/4" and the Ghost at 2" on page 47 in shiny lime green cardstock.  The Ghost also has a black glittery backing that I offset slightly  (hard to see that in the picture).  The Orange Typeset paper is from MME Haunted 6X6 paper pad I bought at Michael's craft store recently. I used the left over chipboard cut out to put it on and added a little bit of Orange Marmalade Distress Ink on the edges. I tied some fun ribbon from my stash and added a few dangling gems for some more sparkle.  A girl can't have too much sparkle in her home, right?  LOL

Hopefully in this view you can see that the frame is made in layers using
pop foam dots to give it more dimension.
 
One of the images for the frame on the cartridge is the stand.
As I mentioned before, I not only used chipboard to the make the frame and
stand but I then covered both with black cardstock to give the frame a more finished look.
I bent the chipboard stand slightly at the score marks so that it sits correctly
on the back of the frame and adhered with double sided score tape.
 
And here is the final Halloween vignette on my hall table now. 
The great glittery lime green skull head was only $2.50 at Target
and so was the glittery trick or treat flameless candle that I put on a
crystal candle holder base for some added height.  
 
Now I just need to decorate the rest of the house so stay tuned for more Halloween Decor !
 
Thanks so much for hopping along with us.  Please be sure to check out all the participant's wonderful projects and leave a comment.  We love to know you stopped by.  I've posted the list below in case you've missed anyone. The next blog you will be visiting belongs to the very talented Khrista at Creative and Crafty Teacher Blog.

Here is the list of Blogs if you lost your way.
Debbie @ www.debseclecticthoughts.blogspot.com   YOU ARE HERE

Tuesday, August 7, 2012

MEET ANGELINA ...an adorable Movable Monster

There is a new Cricut Craft Room Exclusive Digital Cart called "Movable Monsters".
 As you can imagine after taking one look at these Halloween images, I was more than willing to "test drive" the Movable Monsters and create one for you all to see. There are several monsters to choose from: Skeleton, Frankenstein, Bride of Frankenstein, Witch, Cat, Scarecrow, Dracula and a Zombie.

All the monsters are made in pieces so you can add brads to make their body parts movable which is so fun. Unfortunately, the digital cart doesn't have any instructions so putting this together was a bit of trial and error but I think it turned out okay. You can cut the images at any size but I choose to make my monster a total of 4 ft tall.

So... INTRODUCING ANGELINA - She was created as a DATE for Skeleton Brad who was made by another Cricut Circle member.  
Hanging about 4 feet tall, she was cut at 12" for each section of her
skeleton body out of white poster board. I outlined her bones with a
Spectrum Noir EB1 Alcohol marker to add a little more dimension.
The bone shapes were attached to each other by using white brads.
To make her a little more Girly, I used pink glitter paper for her "insides" and accessories.
And of course, I had to bling her up a little bit too with some rhinestones since she was
going on a DATE ! Her crown and heart were made using Create A Critter.
Her purse was cut from Forever Young at 4" and highlighted with
Spectrum Noir BP6 Pink marker.
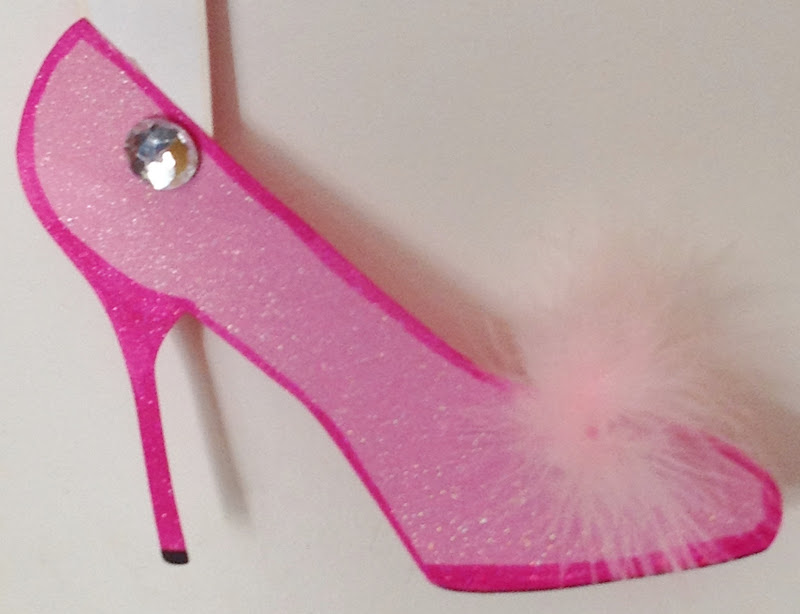
And her fab-u-lous Shoes were also cut
from Forever Young at 6". I added a little fluff to the toe
and again highlighted with Spectrum Noir BP6 marker.
And since no girl would go on a date with out getting their nails done,
I did her nails with Spectrum Noir BP6 marker.
Plus added a bracelet with some rhinestone mesh cut to fit her wrist.
Well, Angelina is ready for her date with Skeleton Brad, I hope he shows up or she
will be crushed after all the trouble she went to get dressed up for him :)
CRICUT INFO & SUPPLIES USED:
Designed by: Debbie O'Neal
Cricut Machine Used: E2
Cricut Cartridges Used: Movable Monsters Digital, Create A Critter, Forever Young
Other Supplies Used: White poster board, pink glitter cardstock, Spectrum Noir Markers,
Rhinestones, Brads, Googly Eyes, Feather Boa, Adhesives

Tip: To super-size the monster, I used the 12X24 Cricut mat and cut the posterboard to fit the mat since I didn't have any of the 12X24 paper pads on hand. I bought the poster board at a local craft store. I recommend you use either a Gypsy or Cricut Craft Room to help you fit the most images on the mat to save cutting time. To maximize your space, you will need to turn and move the images around on the mat. Just don't flip the images or they will come out backwards and be hard to fit together with the other pieces. For the pink glitter pieces, I used 12X12 standard glitter cardstock and a 12X12 mat. I did move the bones pink layer images around on the mat slightly to be able to fit the entire 12 " size.

Tuesday, November 1, 2011

Halloween Aftermath

We enjoyed dressing up last night and giving out candy to all the cute kiddos that stopped by. Even though our kids are grown we both love carving a pumpkin every year to put out on Halloween night.  This year's efforts were done about an hour before the trick or treaters showed up so not too elaborate but cute.
The kiddos seemed to really love them.


Monday, October 31, 2011

Let's face it...Halloween is ALL ABOUT THE CANDY !

Since Halloween is "ALL About THE Candy" for the kiddos, and lets face it most adults too, here is a fun CANDY BANNER to get you in the mood.
This banner was made using the Tim Holtz Distress Halloween Kraft Resist Paper
and Distress Inks. Each tag is done using a different distress ink technique.

The Kraft Resist paper is so cool when you add
the distress ink over the top!

I used my Cricut to cut out the letters for each tag out of
the resist paper.  I added distress ink and some distress stickles to make
then spooky sparklie !
As usual, Tim thought to have large, medium and tiny
prints in the paper pad.  I used the tiny paper as
an embellishment and after inking with distress inks,
I outlined with stickles.

It was fun to find some unique embellishments such
as these orange paper flowers that I added stickles too,
the fun glittery epoxy spiders and bats and most of all
the Jolee's Skeleton which I touched with a little distress
ink to highlight his bones ...CREEPY !

If you noticed, I even distress inked the skeleton ribbon that
the banner will hang from. 

NOW WHO WANTS CANDY ??????????????????

Sunday, October 30, 2011

Halloween Treats...NOT Tricks

There are so many yummy treats that can be made for Halloween....Caramel Apples, Popcorn Balls, Pumpkin Bread, Candy Corn, etc.

How would you like a way to put all your families favorite Halloween treats into one cute mini recipe album?
Well, I made this adorable Halloween Recipe album a couple of years ago and wanted to share with you.

The cover is made from chipboard cut slightly larger than
the recipe cards inside. And is hole punched on the top and bound
with binder rings and a variety of ribbons tied on.
 The title is made with glittered chipboard Thicker alphas.
And the treat bags are patterned paper cut out and some stickles added. 
 I love to tie ribbon on to mini album covers for added texture.  

Cute Halloween recipe cards go on the inside.
I added a spot along with each recipe card
so that there was room to add a picture
of the Halloween treats.

I added a few more pages to the inside
by cutting cardstock in same size as recipe cards.
Again, more pp cut out to make an embellishment
and added stickles.

A few more pages to show you.


This would also be an awesome way to do a Christmas or Thanksgiving
Recipe Books for your family or gifts.  You can find lots of cute
holiday recipe cards right now at various stores.  I know I saw some at
Michaels and Target recently.  In fact I bought some Christmas ones myself.

Saturday, October 29, 2011

Happy Halloween !

With all the fun Halloween pictures we are sure to take tonight, I am glad I put together this layout to document all the spooky adventures.

I made this layout for a class I am teaching at Michael's Craft Store.
Lots of fun Halloween papers and plenty of room to add some great
Halloween photos to remember our Spooky evening.

Friday, October 28, 2011

More Halloween Cards

Here are a few Halloween cards I made to send to the kids in our family.  Of course, I am including a few Halloween treats along with these cards for the kiddos.

I don't usually make Halloween cards but I must say I have been having fun this year making them. And the selection of Halloween papers has been too hard to resist.
I just loved this Halloween paper together.  The
ghost is a 3d glittered embelllishment from K&Company.
I used a Halloween wood $1 stamp from Michaels
for the Happy Halloween sentiment.  It is such a cool font.

Who can resist a spider and his web on Halloween?
This paper looked like it was custom made
for the little 3D embellishment.
Again, I used a $1 stamp from Michaels
for the sentiment.

Thursday, October 27, 2011

Getting Ready for some Halloween Treats

I will be making some cupcakes to take over to my granddaughter for her Halloween party this weekend. Decided it would be fun to make some Halloween Cupcake pics to decorate them.

Since I didn't have the cupcakes ready yet, I bunched up some
spider web material and set them in it to show them off.  LOL
I started out by making small paper medallions for each one in a variety of
Halloween patterned paper.

Here is a close up view.  I added stickles around the edges
on some of the paper medallions.
Michaels craft store had a pack of the these glittered
embellishments that were perfect for some of the centers.
I punched a piece of cardstock, added some stickles to the
edge and then used a glue dot to put on the embellishment.

To make the paper medallions into a cupcake pick,
I used extra long tooth picks, a punched out circle out of
cardstock and my Tim Holtz Tiny Attacher to
staple the toothpick to the cardstock.
I then used hot glue to glue the cardstock piece to the back
of the paper medallion.

And waaaalah !  My very own custom made Cupcake Picks.
You could do something like this for any occassion.  It was so fun to
make these and didn't take much time. I made 24 (4) of each design.

Wednesday, October 26, 2011

Something Witchy in the Air !

I made this Witch Halloween Easel Card to send a friend for Halloween. 
Had fun using different cuts from cricut carts and some stickers I had in my stash.


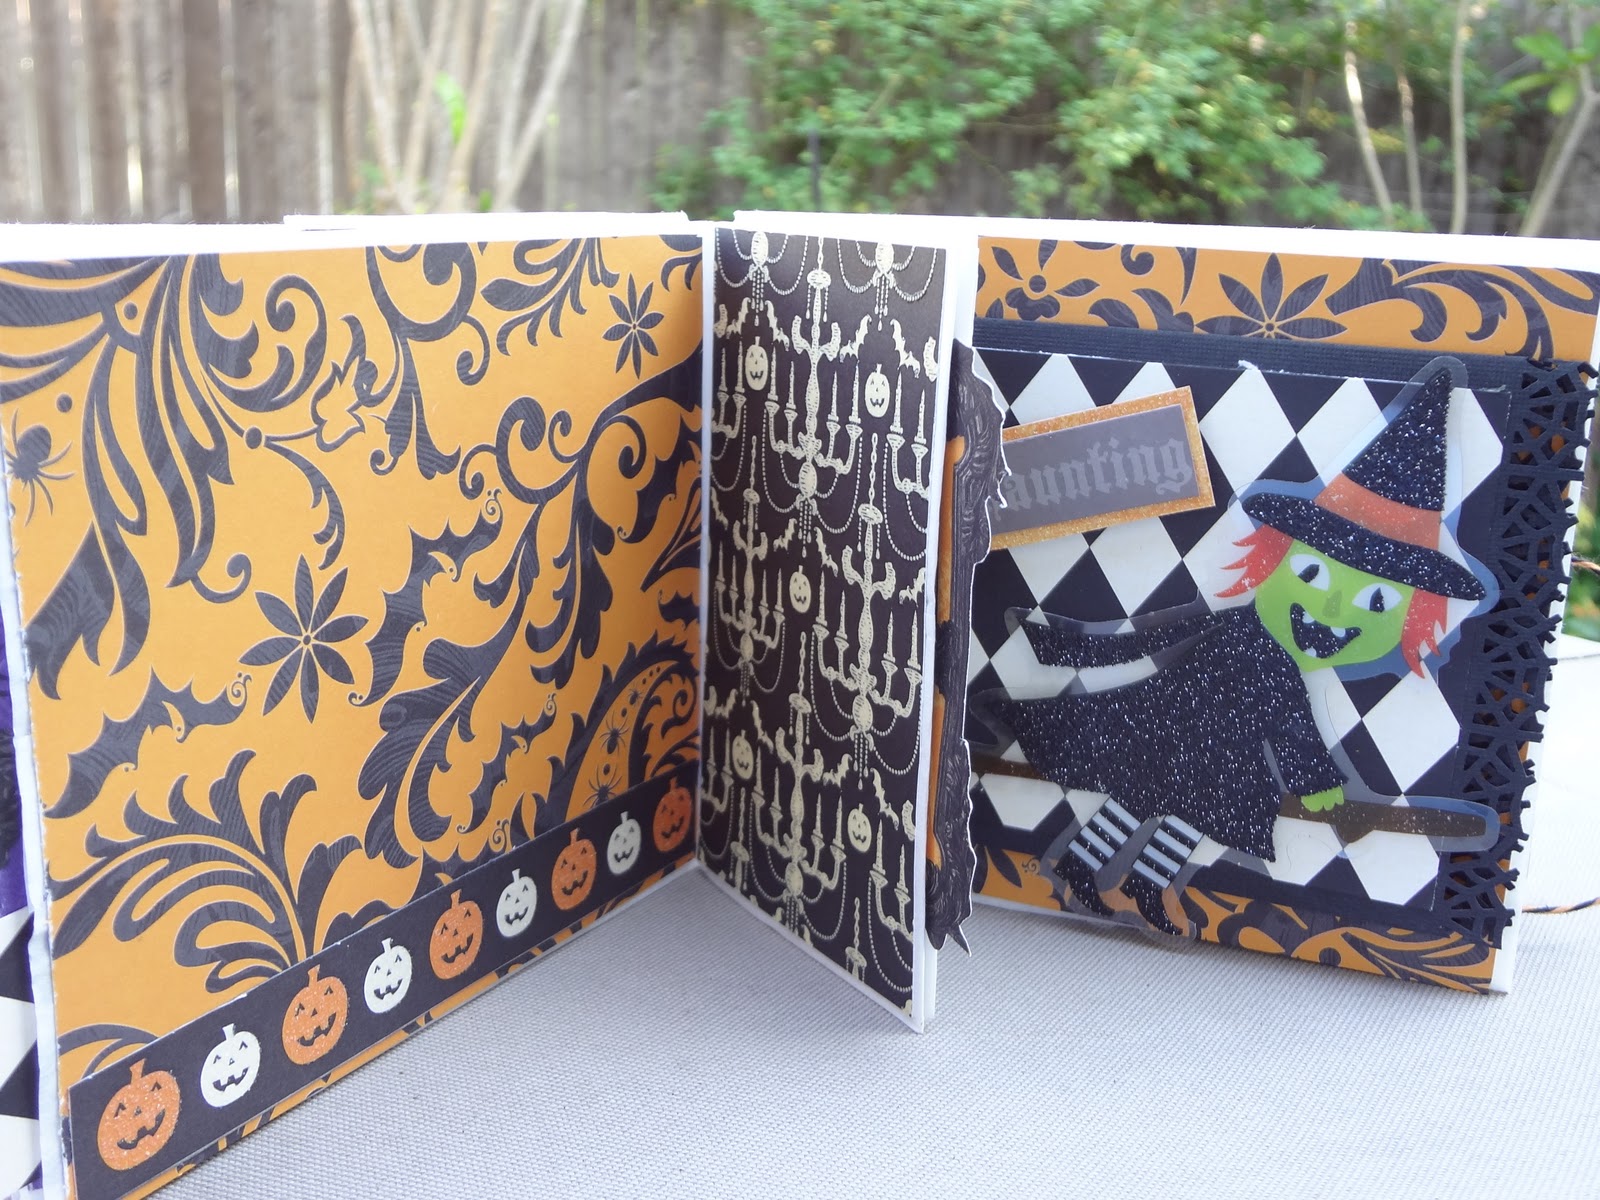
Here is the Easel card opened up. I used black glittered half dome pieces to
use as the stop mechanism for the easel. 

Monday, October 24, 2011

Fright Night Paper Bag Album

One of my all time favorite things to make are mini albums.  I made this Fright Night Paper Bag Mini Album to capture this years Halloween pictures.  I added a few twist to the normal paper bag album by making three different fold outs for more pictures to jazz it up a little and I have provided some directions for how I did that.  If you have never made a paper bag album there are tons of videos on You Tube to show you how.

Cover of album. I used the DCWV Midnight Magic Paper Pad.
Loads of fun glitterly and bold printed Halloween paper!

I wanted to have a closure for my mini album so I used
some twine and a couple of buttons. Using a mini hole punch I 
punched 2 holes in the cover and threaded the twine through that and the large button
and tied it on to create the front closure part.  The small button in the picture
is actually tied to a long piece of twine and tied to the back cover.  (see later picture) 

Inside page 1&2 and the mini pocket that is created with the "bottom" of the paper bags.
Inside page 3&4 and mini pocket
Special Fold Out #1 is adhered to page 4
To create the fold, I used a piece of 12X12 cardstock, 
cut in half to create a 6x12 piece  (save the other half for Fold #2)
I used MS Spider Web border punch and punched along both 12 inch sides.
Then I scored at 4 & 8 inches to create the folds. 
 Added a 1 in strip of pp to bottom of inside fold. 
I know have room for 3 more 4X6 photos and/or journaling.
Adhere the middle fold to the paper bag album page already covered in pp.
Fold up the bottom flap and let the top flap fold down over that.
Then I decorate the top piece of the fold with pp and some
embellishments for a finished look.
Special Fold Out # 2
This fold is created using the other half of the 6X12 section I cut for Fold Out #1
I placed it on an inside pocket tag I created by cutting a 12X12 piece of pp to 4.5 inches
by 12 inches and folding in half to create a front and back. I added a strip of pp
to the side of it to create a tab for my tag.  This is how I made all the Large Tags
I used in the pockets of the paper bag mini album.
I scored the 6X12 piece of cardstock at 4 inches,
then flipped it over and scored at 8 inches.
Thus creating an accordian fold.
Using the MS Spider Web Corner Punch,
I punched the corners of each 4X6 section of the fold out.
Only the top 4X6 section is adhered to the tag.
The rest folds up and ready to pull down to expose photo spaces.

Shows the accordian fold of the 6X12 piece after scoring & folding.

the bottom 4X6 flap up towards the middle flap and
here I added a journaling block.

I then decorated the cover with some pp and a 3d paper embellishment
from Me&MyBigIdeas. I added another of those twine tied
buttons for some added pizzaz.
Inside Pages 5&6 with small pocket.

Special Fold Out #3
is added to page 6 of the paper bag album
after pp has been added to the page

This fold takes (1) 12X12 sheet of cardstock, scored at 4&8 inches along top side,
then turned to score at 4&8 inches along left side.  This will create (9) 4X4 blocks scored
on the 12X12 page.  Cut out the 4 corner blocks.  You will now have a Plus Sign
looking piece with (3) 4X4 blocks horizontal and (3) 4X4 blocks vertical. 
Adhere middle 4x4 square to the center of your mini album page.

Fold the bottom 4X4 square up to the middle, then the left to the middle
Then Fold the right 4X4 square to the middle
And lastly fold the top 4X4 square down over the top of all the others.
Adhere pp to the top square and embellish.  Decorate each inside square as you like. 
 
Example of anothe Large Tag decorated for inside
paper bag album pocket (front side). I hung an
embellishment from twine so it dangled on the front
and back side of the tag.  I added a journaling
block to the front side.

Back side of the pocket above ready for more photos.
For the small pocket inside tags, I just cut double sided patterend paper and
added a 1" pp border for each of the small tags.
The back cover and closure

I hold punched 1 time on the back cover and tied
the long piece of string using about 3 good knots to hold it in place.
I added a little mini button to the loose end that will wrap around
to the front cover to secure the album.
I also added pp to the folded bag edge of the mini album
for a finished look. You can do this before or after you add your covers.

Hope you enjoyed my Fright Night Halloween Mini Album and feel inspired to create one of your own!

LinkWithin

Related Posts with Thumbnails